
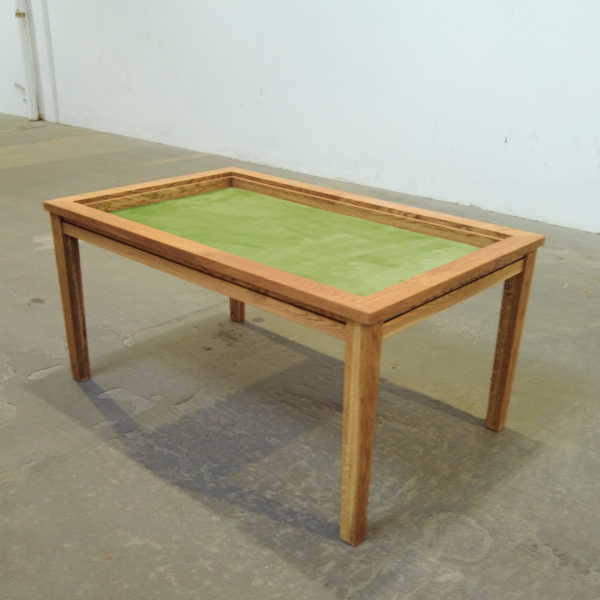
Welcome to our downloadable woodworking plan for an innovative and versatile children’s sandpit with a foldable lid that effortlessly transforms into two sturdy benches. This creative and functional design will provide endless hours of fun and play for your little ones while also offering the convenience of easy storage.
Materials Needed:
Before you start crafting this wonderful children’s sandpit with benches, gather the following materials:
- Pressure-treated lumber, outdoor lumber, Cedar or Douglas for durability and weather resistance.
- Deck screws for secure assembly. Different sizes, depending on the thickness of the wood.
- 12 hinges for foldable lids.
- Sand for filling the pit. I did 5 times 20kg for a sandpit of 1400x1400mm.
- Root cloth to prevent plants to grow in the sandpit
- Paint, stain, or wood sealer for finishing (optional).
- Basic woodworking tools: miter saw, plunge saw, drill, measuring tape, pencil, staple gun (for attaching root cloth) and safety gear.
Step-by-Step Instructions:
- Cutting the Lumber: Begin by cutting the lumber into the required pieces according to the measurements provided in the plan. Ensure accurate and precise cuts for a seamless assembly.
- Building the Base: Assemble the frame for the sandpit base using the cut lumber pieces. Connect the corners with deck screws to create a sturdy and safe foundation.
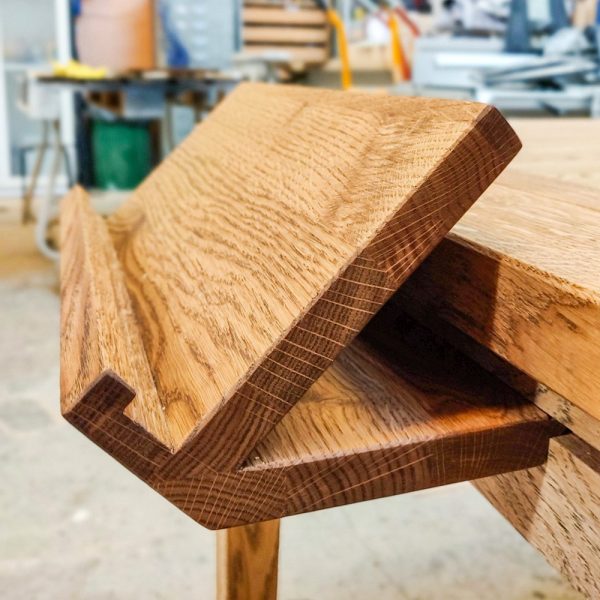
- Making the lids: Place all planks in order and fix the diagonally sawn beams. Then screw the hinges in the right place and test the lids.
- Sandpit root cloth: Attach the weed cloth to the bottom of the base. Flip it over and put it in place. This will keep the sand contained and prevent it from mixing with the soil underneath.
- Creating the Foldable Lid: Assemble the lid with the remaining lumber pieces, ensuring it fits securely on top of the sandpit. Screw the lids end to the base and test it 1 more time.
- Finishing Touches: Optionally, you can paint, stain, or apply a wood sealer to protect the wood and enhance its appearance. Choose child-safe finishes suitable for outdoor use.
- Sand Filling: Fill the sandpit with clean, child-safe sand up to a suitable depth. This will create a soft and inviting play area for your little ones.
Usage and Safety Tips:
- Always supervise children while they play in the sandpit.
- Close the lid after playtime to keep the sand clean and dry.
- Check the sand regularly for debris or foreign objects.
- Apply periodic maintenance, such as sand replacement and checking for loose screws.
- Position the sandpit in a shaded area to prevent overheating during hot weather.
Conclusion:
Congratulations! You’ve successfully crafted a multifunctional and delightful children’s sandpit with a foldable lid that transforms into two benches. We hope this woodworking plan brings joy and fun to your little ones, creating cherished memories for years to come. Remember, safety is paramount, and with proper care, this sandpit will provide countless hours of enjoyment in your outdoor space.
Download the plan now, roll up your sleeves, and let the woodworking adventure begin!
Happy crafting and happy playtime!
downloadable building plan

